Garden
Last Edited on : Nov 14, 2017, 17:53 (UTC+3)
Garden
Gardening can be thought of as similar to farming.
Renting fences and installing them in the area you want will allow you to plant seeds inside and harvest the fruit that you’ve grown.
What’s more, you can obtain quality seeds through Plant Breeding and re-plant them, or you can obtain Haystacks to raise cows and produce milk.
In order to maintain your own garden, you need to prepare.
It’s not hard. Let’s begin with this step-by-step guide below.
Contents
- 1 Renting Fences
- 2 Installing Fences (Preparing your garden)
- 3 Planting Seeds
- 4 Crop Management
- 5 Harvesting
- 6 Demolishing
Renting Fences
To run a garden, the most important thing you’ll need to prepare is ‘Contribution Points’.
Since fences are required items, they can’t be purchased and need to be rented through an NPC.
Although there are different fence types, the sturdiest ‘Strong Fence’ will cost you 10 contribution points.
If you return the fence, you will get the 10 contribution points back.
※ After you rent the item, if you already have the same item in your inventory, you will not be able to rent additional items.
If the item is not in your inventory, renting it will be possible.
So you may wish to put it in storage if you want to rent a number of different fences.
Item Name | Maximum Crop Yield | NPC you can rent from |
Small Fence | 4 | [3 Contribution Points needed] Dias Farm : Enzo, Altinova: Difry Hussey |
Plain Fence | 7 | [6 Contribution Points needed] Toscani Farm: Paola Toscani, Moretti Farm: Mercianne Moretti, Northern Wheat Plantation: Norma Leight, Gianin Farm: Goolie Gianin, Trent: Langus, Altinova : Finlin |
Strong Fence | 10 | [10 Contribution Points needed] Heidel : Flaviano, Calpheon: Geranoa, Altinova: Lashir |

Installing Fences (Preparing your garden)
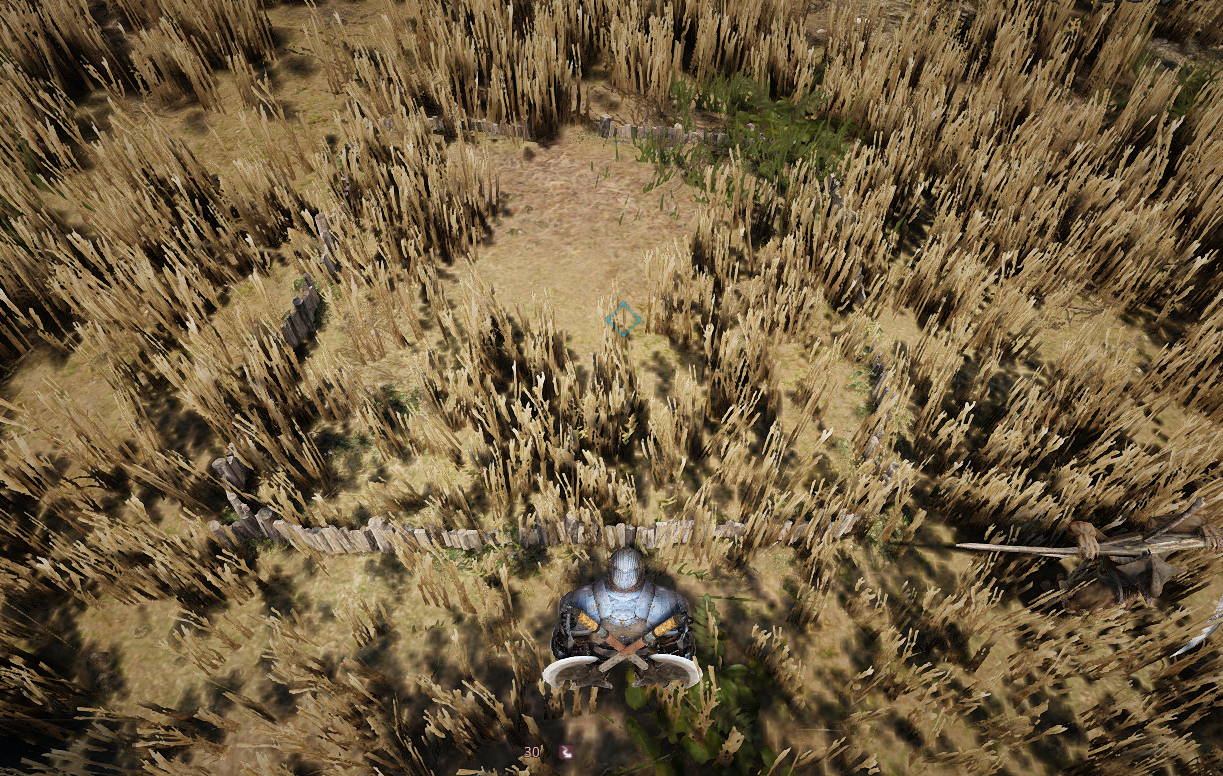
After you rent fences, you can install them in non-safe zone areas.
In order to install, right-click the Fence icon in your inventory which will take you to the ‘Place Mode’. There, you can place the fences in the location you want with your cursor.
Avoid obstacles like rocks and trees when you install the fence. Additionally, it would be more convenient to place it close to an area you visit most frequently to speed up harvesting.

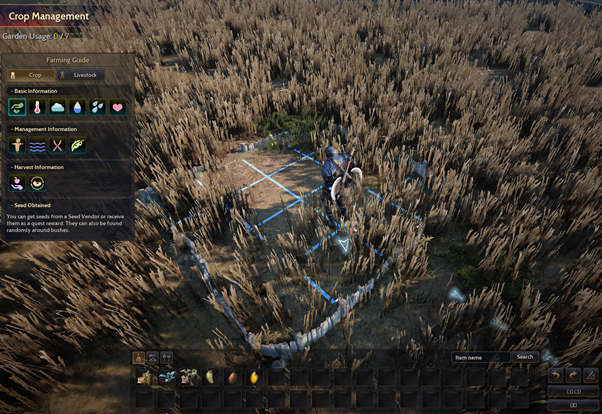
▲ In Place Mode, you can place fences only areas where the (install) box pops up in green
When you have completed installing, get inside the fence that you just placed and interact with the (‘R’ key) to start managing your garden.
Planting Seeds
If you have your garden ready, the next step is to plant seeds.
You can obtain seeds gathering from bushes and plants, or you can buy them from an NPC.
You can plant Seeds, Seed Sweet Potatoes (Seed Potato), Hyphas, and Haystacks in your Garden.
▲ Planting seeds is similar to installing furniture in a house. At the bottom of the screen, you can see the seeds available for planting. Select a seed and drag it to a lot you want.
Note that there is a limited total number of lots when you plant seeds in a garden.
Each seed type has a ‘Tooltip’ that lets you know how many lots they take up. You’ll need to take this into account when you are planting.

▲ A Haystack takes up 4 lots.
When you are done planting a seed, the crop will display with 0% growth.
It should grow nicely as time goes by.
Crop Management
If you’re done planting, now it’s time to manage your crops.
Crops are sensitive to humidity and temperature. They are also vulnerable to attacks from pests, blights and birds.
You will periodically need to prune your crops, and make sure that they have enough water.
Using fertilizer will speed up the growth rate as well.
Pest blights and the need for pruning your crops will appear randomly with a fixed chance.
If you run into these problems, the crop’s growth rate drops significantly, so you need to make sure to resolve these issues quickly.
If you do the Pruning and Killing Insects actions, you will earn Farming EXP.
Also, you may randomly earn loots which can include valuable items such as the ‘Black Crystal Shard’.

▲ If your Fence icon turns red in the World Map, it indicates that there is a problem you need to attend to.

▲ If the yellow growth bar turns red, it indicates a pest infection caused by blight or entangled branches.
In these cases, approach the crop, interact with it (shortcut key ‘R’) to start Pruning and Killing Insects (consumes Energy 1).
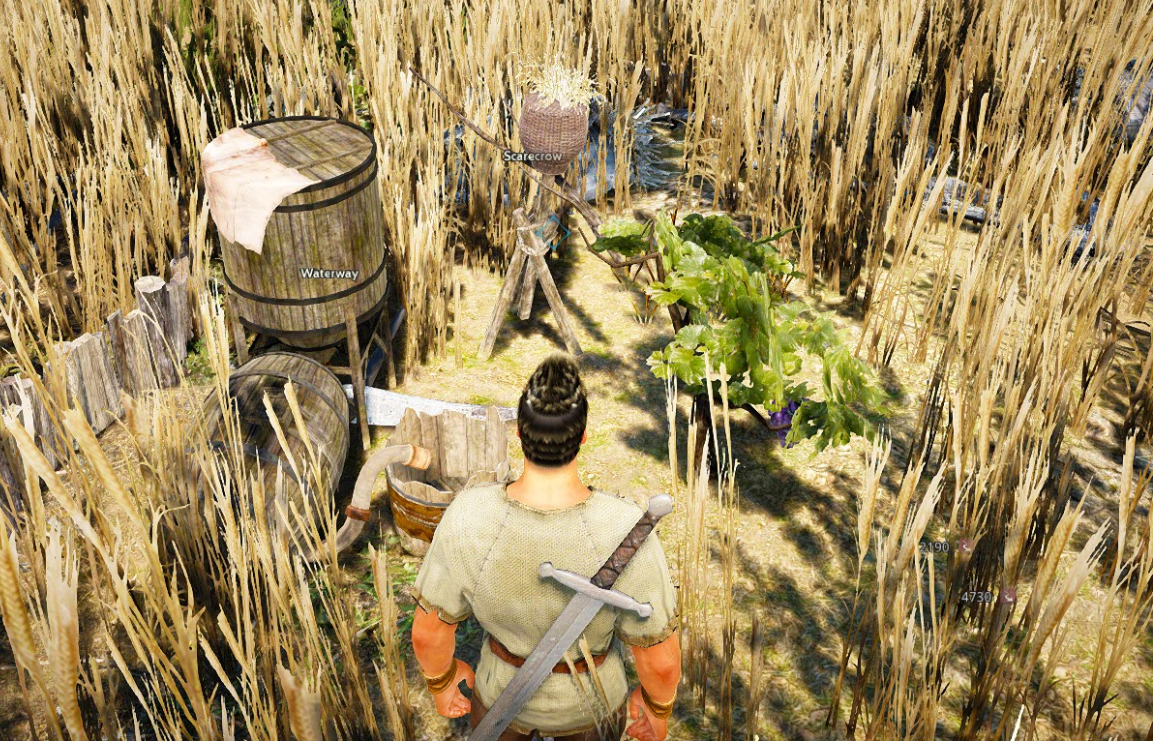
For your convenience, here are some gadgets that you can install in your Garden to protect your crops.
To begin, a Scarecrow will keep attacking birds away.
You will see a difference between the quality of your produce with, and without a Scarecrow.
Next, a Waterway.
As mentioned before, you need to feed enough water to your crops to boost the growth rate.
If you install a Waterway, you won’t have to worry about a water shortage.
In order to obtain a Scarecrow, buy a house and set its purpose as ‘Carpentry Workshop’ in which you can craft a Scarecrow.

▲ The crop on the left has no Scarecrow and no Waterway. It can’t protect against birds and also has low water absorption.
Meanwhile, the crop on the right is protected from birds and has a stable water absorption rate.
Now, here are some activities you can do yourself to help the crop grow.
If the crop needs water, get some Distilled Water (or Purified Water) ready in your inventory and take it to your garden. You can right-click on the item and the crop will be watered.
You can also use fertilizer in the same way in order to boost the growth rate.
In order to obtain Distilled Water, purchase an Empty Bottle from the Material Vendor and go to the river to fill it to make ‘Bottle of River Water’. Then bring up the processing tab (shortcut ‘L’) to heat it up which will give you Distilled Water.
The simplest ‘Inorganic Fertilizer’, can be obtained through drying such grains as Wheat or Barley in the processing tab.
Lastly, if you find all these methods too burdensome, you can send a worker to do the work for you, or just leave the garden unattended.
If you send a worker, they’ll have trouble taking care of the moisture level or bird attacks, but will take care of Pruning and Killing Insects, which will help you conveniently run your garden.
Leaving the garden unattended means leaving your crops to be eaten by birds or insects.
If unattended, your crops will take longer to grow to 100%, but it also means that you can do other things in the meantime.
You can choose your strategy according to your own preferences.
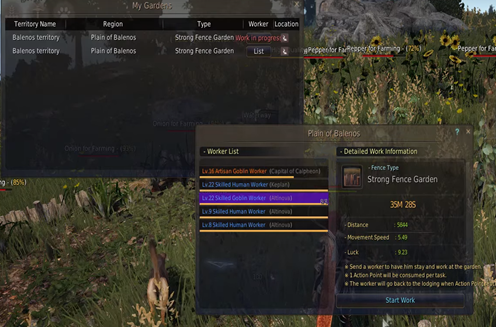
▲ Click the ‘Garden’ icon on the top left to view the list of your gardens. Then click the ‘Worker List’ icon to send a worker to your garden.

▲ Consider assigning a worker to do the work for you.
Harvesting
Regardless of how you managed your crops, when the crop has grown to 100%, you will be able to harvest them..
Although the growth value goes up to 200%, you can harvest your crop at 100%~199% with no losses. Once it reaches 200%, the crop gets old and your harvest will be significantly smaller.
Crop harvesting is divided into ‘General Harvesting’ and ‘Plant Breeding’.
General Harvesting allows you to reap the ‘fruits’ from your crops.
Plant Breeding allows you try breeding your seeds to a higher value.
Once you succeed in Plant Breeding, you can obtain several seeds of a higher class.
There are no penalties to attempt Plant Breeding when you crop is at 200%.
So it would be more profitable to choose Plant Breeding for the crops that are at 200%.
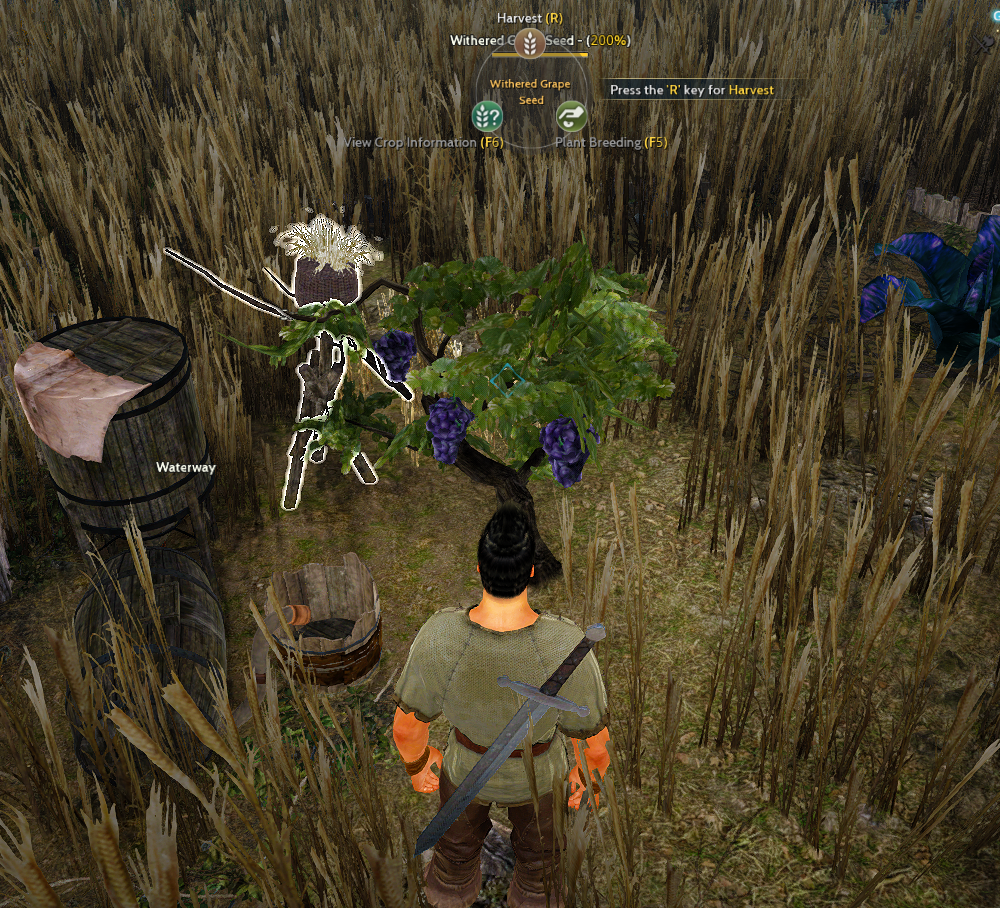

▲ On the left – General Harvesting, on the right – Plant Breeding (There is a chance of success/failure when you breed).
Demolishing
If you don’t use a fence for a week after installing it, it will be demolished automatically,
When being demolished, please note that any crops that are not harvested will be removed as well.
Demolished fences will be sent to storage in the nearest town.
You can demolish the fence yourself if there are no crops in the garden. The fence you demolished can be retrieved back into your inventory.
You can take the fence with you and install it wherever you want to grow crops.
* The content of the game guide may differ from the actual game content, depending on the update and content changes.